MCBB 9: Storyboarding the Book
"We Are Jellyfish" Picture Book Process
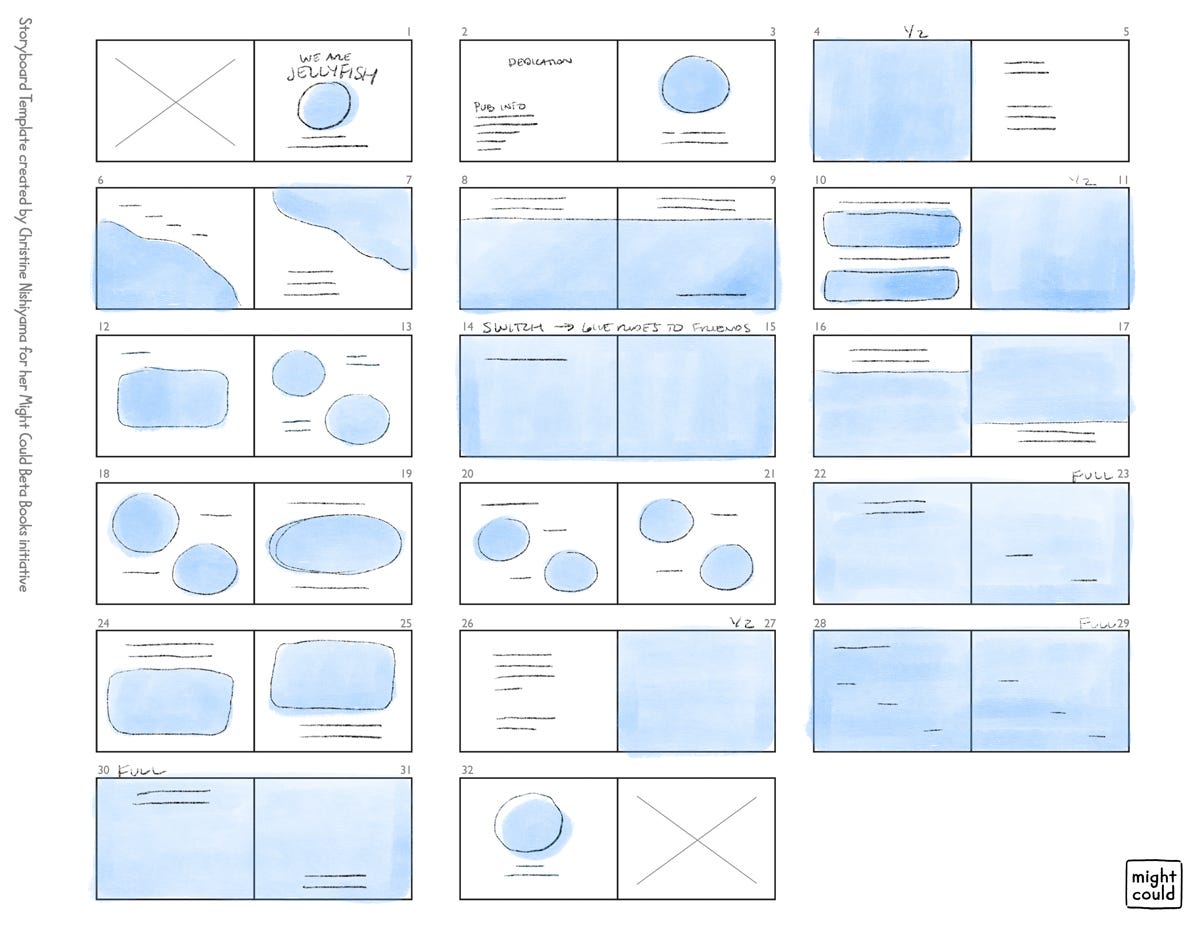
Now the visual fun begins!
My first storyboard iteration (above) comes out of a process of trial and error to find the visual rhythm of the book. My bookmaking process tends to be quite design-focused, as my formal education was in graphic design. So I like to begin by storyboarding out the whole book as an overall design, rather than drawing sketches of the artwork on each page. This lets me ensure there’s a good balance of illustration types (full, half, vignette, spot, etc.) and a flowing rhythm from beginning to end. For me, cementing in these core elements at the beginning of the storyboard process makes the book stronger and more cohesive in the end.
I also learned while working with Scholastic on my previous books, that having the overall page layout set before drawing encourages more creativity than beginning to draw with a blank slate. By giving myself constraints and having to work within those boundaries, I end up coming up with more interesting outcomes than if I had started with endless possibilities. Also, it’s easier to begin drawing when there’s already something there to guide you. And since I’m the one designing and laying out this book, all of this design is simply that—a guide to get me started. I can always shift and change anything I want once I start drawing.
Laying out the typography and general illustration sizes in the book spread by spread also lets me have another pass at both the manuscript and pacing of the book and make another round of edits.
For example, when I got to spread 14-15, I realized I wanted to have a visual punch at that point in the book (for rhythm and pacing) and thought a full-spread illustration would work best in that moment of the book. But the text I had placed on that spread in the manuscript and book dummy was not a good match for a full-spread illustration.
Full-bleed, full-spread illustrations are generally used at moments of drama, shifts in narrative, or breaks to the rhythm. For this particular instance, I wanted a break in the rhythm (both in the visual art, written text, and mood). So I decided to swap the original text from pages 14-15 with the text on pages 18-19, now giving that spread:
content more suited to a full-bleed illustration instead of spots and vignettes (a break in the visual rhythm)
one line of text instead of two to four (a break in the written rhythm)
and a bit of humor and exaggeration instead of scientific facts (a break in the mood).
After I’ve drawn out a storyboard book design that I like (which takes a lot of trial and error), I bring it into Photoshop and typeset out the manuscript in close-ish-to-final type size. This gives me a better idea of how much space I’ll have to draw with throughout the next stages of storyboards. Here is the final version of that typeset storyboard:
And that’s a wrap on this first iteration of storyboards! The next step in my Might Could Beta Books project plan is to storyboard out the story in very simple sketches. But I actually am going to skip that for right now and move on to the next step, 9. Develop the Art Style. I didn’t do much sketching at the beginning of this book process, and I feel I need to spend some time studying the visuals of jellyfish and drawing lots of jellyfish before I begin sketching the story.
I’ll be back next week for paid subscribers with my very first jellyfish sketches and explorations into the art style of this book! If you’re on the free plan and want access to all the Might Could Beta Books steps, further resources and guidance on illustration types and storyboarding, and want to see all my art style explorations for this book, upgrade your membership today!
See ya next week with a whole lotta jellies! :)
<3,
Christine
Very cool, I like the idea of exaggeration and humor to break up some of the scientific stuff!
So cool to see the process!